instructions

CLICK ON IMAGES FOR LARGER PHOTO

Sunday, April 21, 2013

Holy Smokes I Never Posted MY DRAWINGS!!!!

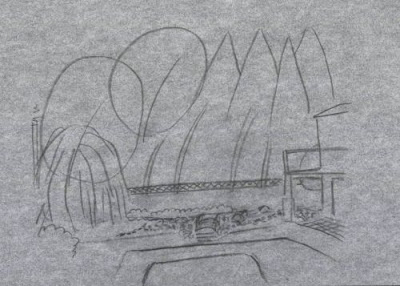
Here I was working on a better picture for the header since the other one was too big and took up the whole screen. I wanted more of a banner. I added a picture from the Architectural Rendering class and realized I never posted those pictures! So here's the drawings of the backyard I did for week 4 of Architectural Rendering for Landscape and Garden Designers with Jo Chance. I really learned a lot from the class and enjoyed doing the drawings. In fact, both this class and the previous class with John Brookes really sparked my interest in drawing again so I've gone on and done more and tried out different styles and such.


Jo Chance declared this one as well done. Which made my day!
One student complained that we didn't do any drawings that were from the top or bird's eye views or as he called it outline plans. So she  gave us some tips on those as well and I took the plan I've been working on using John Brookes instruction and books and used her coloring suggestions.


I would color in less of the driveway and sidewalk on the next try as well as adding shadows. BUT I changed my mind about some of the basic design so I'm redrawing at that stage first before coloring again. Wow this is a lot of work but I love it!


Saturday, April 20, 2013

Missouri Botanical Gardens

Escaped from my meeting for about 4 hours to see the Missouri Botanical Gardens. I was in desperate need of fresh air and sunshine. It was 51 degrees and the air had a perfect little crispness like Fall but the sunshine was all Spring.

Here's some of the plants that I thought belonged in my garden and yard!


I put some more and made a separate page just for the Missouri Botanical Gardens on the pane to your right.

Thursday, April 4, 2013

www.growveg.com new tools (no pun intended)

GrowVeg.com added some cool new features! It now has layers for irrigation, structures, layout, plants and text so you can work on just irrigation. VERY COOL!!! I put all these things in before by making them from lines and squares so this is really handy.

The first 2 pictures show the view looking at all the layers and obviously it get's kind of crazy.


And here is just selecting plant layer:

The other structures are there but faded. So I'm thinking about putting the peas in along the edge of the bean fencing! How come I never thought of that before! But right now I'm going back to sleep as I have had headache all night.

Soil Temperatures

I meaasured the soil temperatures and pH's in the garden beds and sadly still too cold for peas (43) in the spot where I planned to put them on Monday. So I'm hoping this am it'll be warmer.  Overall the beds varied more than I expected in the pH department.

Bed by # starting

7: 43 deg                        8: 43 deg
   pH 6.5                            pH 6.5

5: 45 deg                        6: under hoop
    pH 7.0

3: 46 deg                        4: 50 degrees!
   pH 6.5                            pH 6.5

1: 46 deg                        2: 50 deg
    pH 6.5                           pH 5.5

Front of gate
L side:                            R side:
46 deg                           46 deg
pH 6.0                           pH 6.5

So I wasn't settled on where everything was going anyway so I revamped it this week and now putting this crop of peas in bed 1. Going to collect the wood ash from parent's fireplace to supplement them.
Per Botanical Interests see below soil temp of 40 is enough. I was going on 45 from the Almanac?


Pea Shelling Green Arrow HEIRLOOM Seeds

Pisum sativum

Item #0037


65 days. Remember as a kid the fun of popping open a pod and eating the sweet green peas found inside? Bring back the memories and enjoy the ease of growing peas on productive, disease-resistant plants that reach only two feet tall. Pods set in pairs atop the plant make harvesting easy. Great for fresh eating and freezing.
This packet plants two 8-foot rows.
Days to Emerge:5-10 days
Seed Depth:1"
Seed Spacing:
2"
Row Spacing:
18"
Thinning:
Do not thin

When to sow outside: RECOMMENDED. 4 to 6 weeks before average last frost or as soon as soil can be worked. soil temperatures must be above 40° F. in USDA zones 8 or warmer, sow in fall or winter for winter harvest
When to start inside: Not recommended.
Special germination instructions: Soak seed in water for 12 - 24 hours before sowing.
Harvesting: Shelling peas should be harvested when the pods are plump, about 3 weeks after flowering. Peas that are too mature are tough, and will cause the plant to stop producing; therefore, harvest regularly when pods are at their peak. Use scissors to harvest or hold vine with one hand and pick pod with the other to avoid breaking the brittle vines.
Artist: Eve Reshetnik